How to activate Smart Track on a target
You can activate Smart Track (GPS pings) on a target on the Phone numbers tab of the People and devices screen. Click for the phone number of interest, from the menu select Smart track then select Enable location monitoring (Smart Track).

This topic describes how to activate Smart Track on a target person.
You can also click here for a short video showing how to activate Smart Track on a target.
-
Create a case.
-
Click Create new case, then click Without wizard. The Create new case screen opens.
- In Case type select the type of case. This selection simply helps you filter cases in the future making them easier to locate. It does not change any subsequent settings.
-
In Case name, although it is optional it is recommended that you enter a name for the case so that the name means something to you, for example "Jewelry Store Robberies". However if you don't, OSS-ESPA will automatically create one which is titled using the format "Case <n>", where <n> is a number which increments each time a user on your OSS-ESPA account selects to automatically generate a case name.
-
Ensure Enable deconfliction (X-Case data search) is selected if you want the case data to be visible and usable for all account users if they do an identifier search for an identifier that occurs in your case. Identifiers can be phone numbers, IMSI, IMEI, names, license plates, and social media accounts. For further information refer to Enable deconfliction (X-Case data search) .
-
Click Next.

-
- Add the target.
On the Manage case screen click New person.
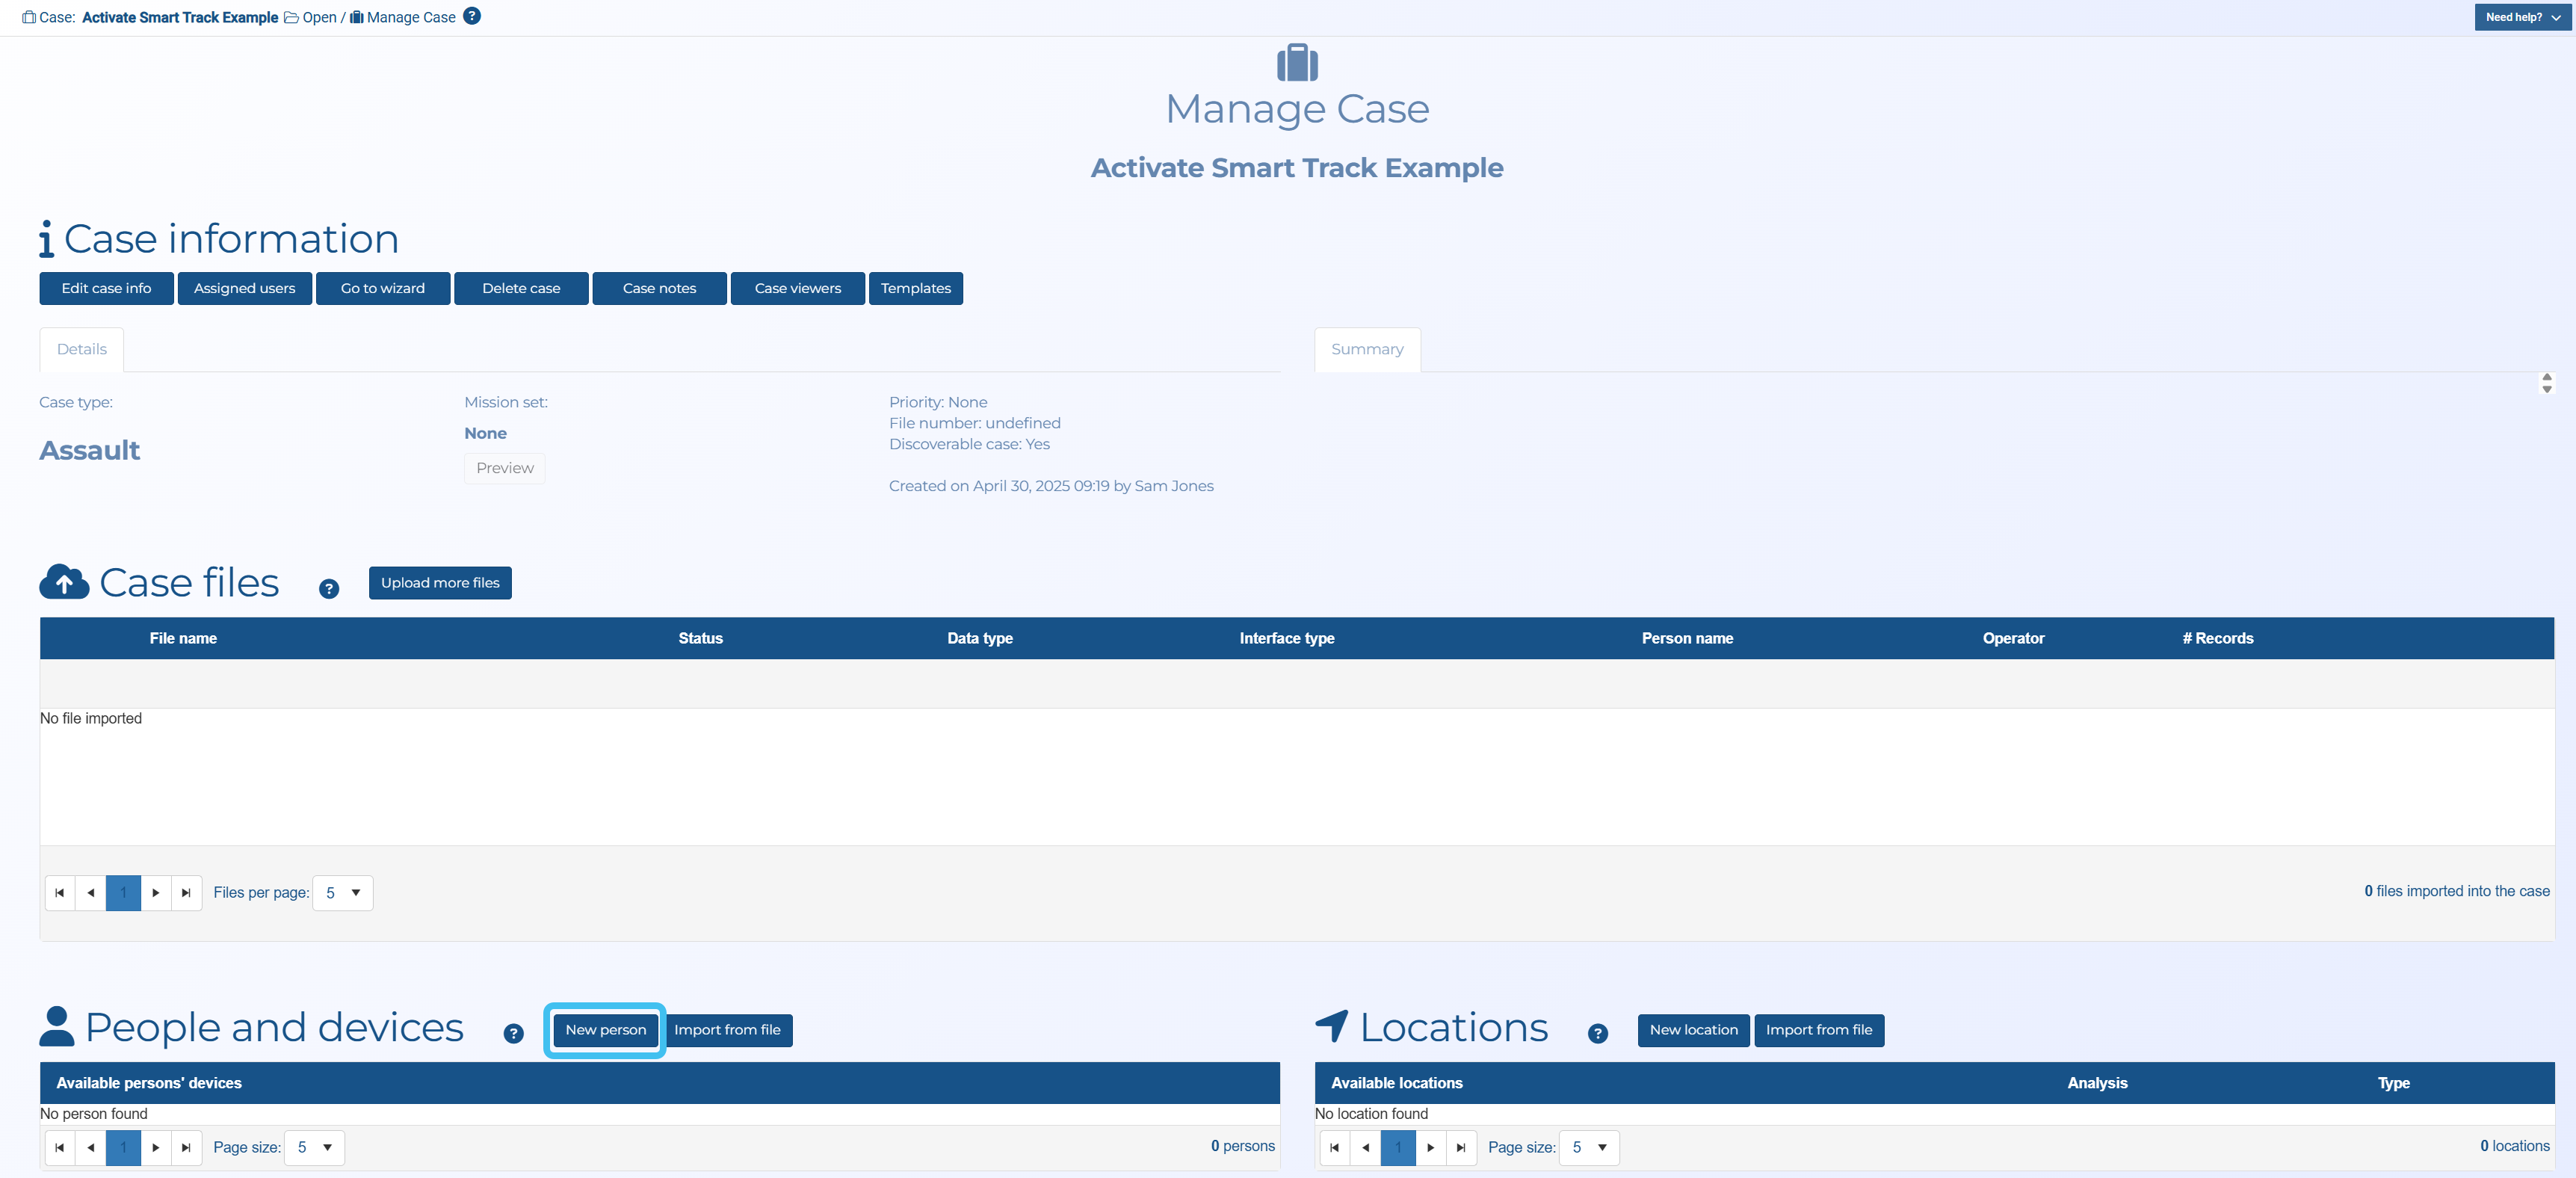
The People and devices screen opens.
For the Personal details, it is recommended that you complete First name, Last name, and Person type then click Save.
The person you just added is now displayed in the People list.

-
Add their device.
-
Click
 , to display the Phone numbers tab. If the settings for entering a new phone number are not already displayed, then click New.
 -
In Phone numbers complete Phone and Operator then click Save.
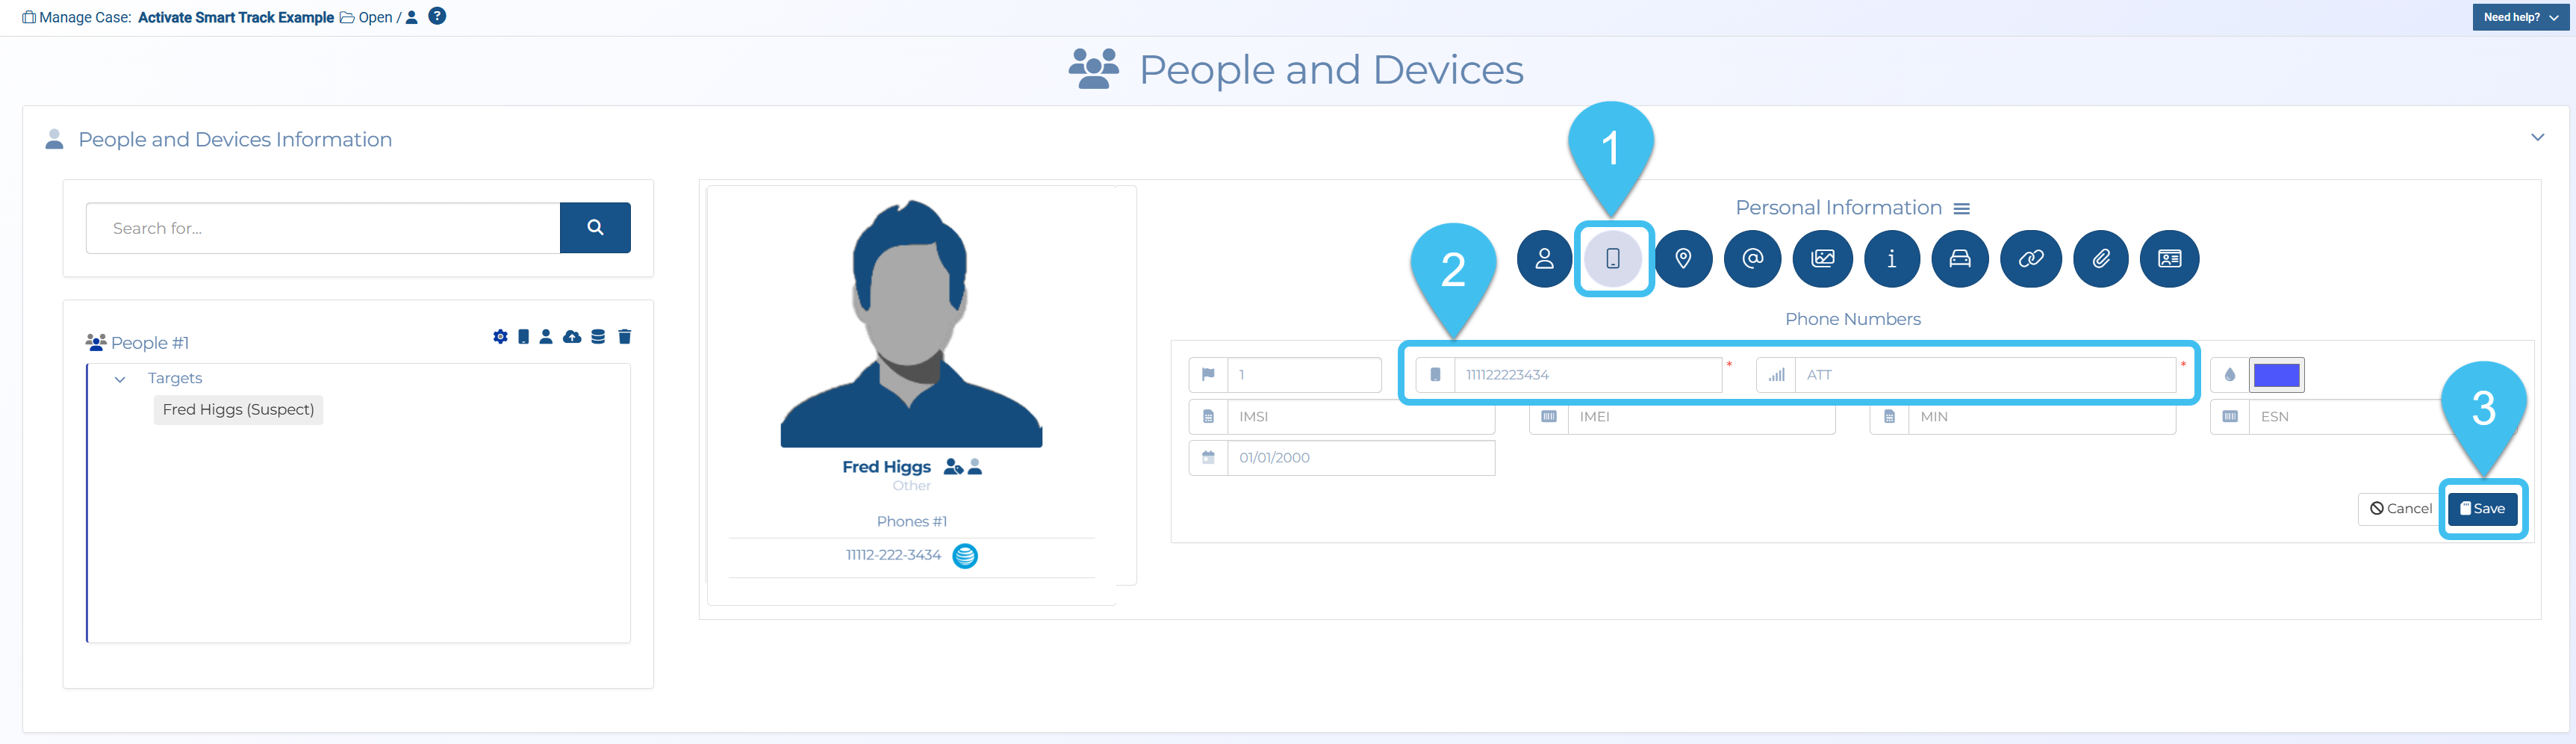
The phone number you just added is now displayed in the Phone numbers tab.
-
-
Enable Smart Track on the device.
-
Click
for the phone number of interest, then from the menu select Smart track. 
Note, by default Smart Track is only supported when the phone's normal operator supports Smart Track. If you want to use Smart Track on roaming operators then click
, then from the menu select Edit phone, then select the required operators in Roaming operators. -
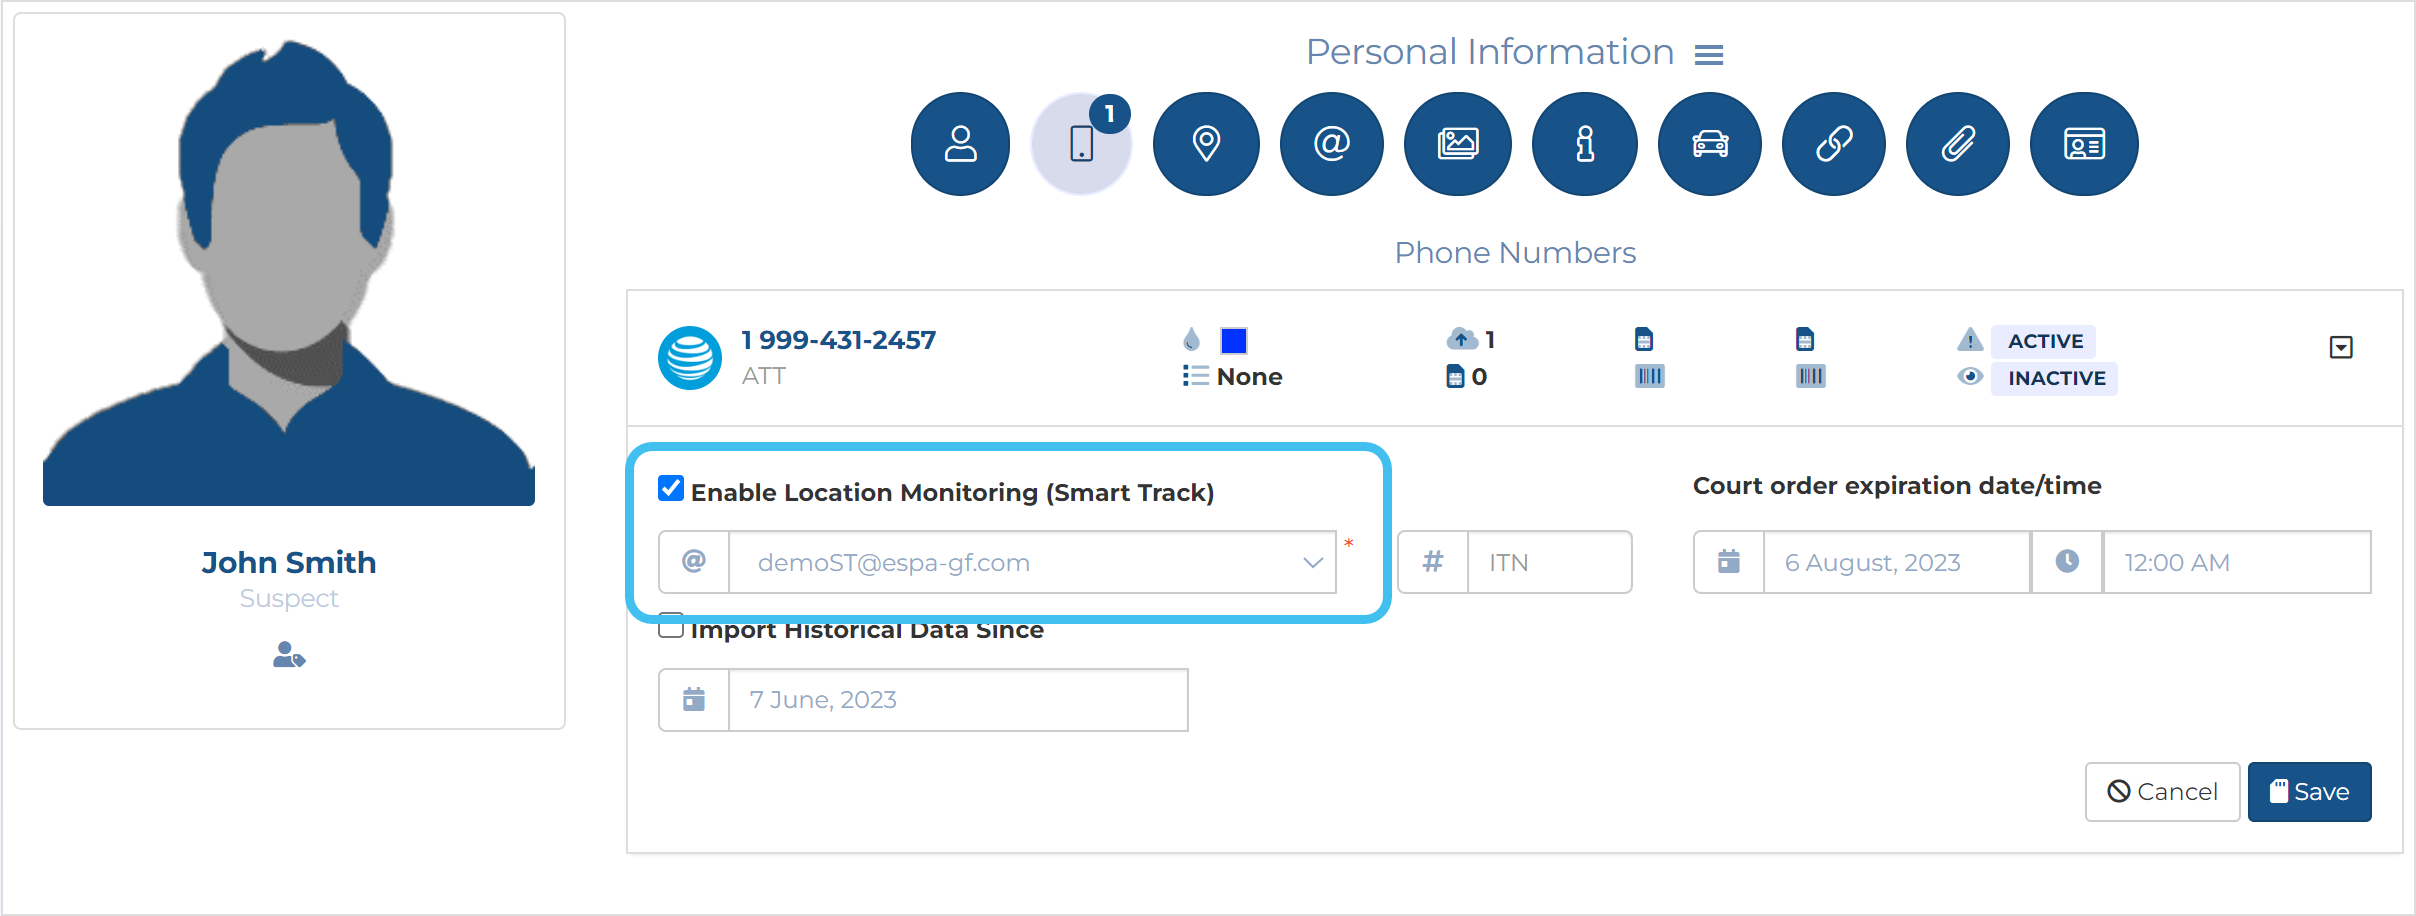
Select Enable location monitoring (Smart Track).
-
In Import from ensure the correct email is selected, often this is defined by your administrator.
-
If the operator is:
- Sprint or Verizon then in Case ID ensure the Case ID supplied by them for this phone number is entered.
-
ATT then in ITN enter the ITN supplied by ATT for this phone number is entered.
-
You can also enter any Roaming <operator> code that is requested so that when the phone is not on its normal network, you can still receive GPS pings. Note, you must also send a warrant to the roaming operators to receive the data and any required code.
-
If you have been receiving data for a few days and want to include that in the case then in Import historical data since select the date you want to import from.
-
Click Save.
-
-
If you are already receiving data, if you return to the Case management screen, in Case Files you will see the live ping files listed.

-
You can now view the live GPS pings on the Sentinel screen.
-
Click
 to open the Sentinel screen.
-
On the Input and settings view select Real time.

-
Click the Location events view.
-
The Event type column lists the GPS pings that are being received.
-
Click the icon in the Actions column to center the location of the GPS ping on the map. The most recent GPS ping is displayed on the map with a spinning
 icon. Click on any GPS ping icon on the map to display the details and to view the accuracy radius and the location on Google maps.
For further information refer to How to view GPS pings on the Sentinel screen.
-
-